Quick Links
-
How to Open the Wooden Box in Machinika Museum Chapter 3
-
How to Complete Chapter 3 in Machinika Museum
In Chapter 3 of the popular puzzle mystery game Machinika Museum, players will find themselves unraveling another box to find a strange-looking alien device, which looks similar to that of a small scroll. In order to complete this chapter, you will need to successfully learn more about this item, and the secrets that lie inside about the aliens.
If there are certain parts in Chapter 3 that you are stuck on, this guide will walk you through everything so you can complete the chapter successfully. We will show you exactly how to unlock the box, and how to study the new alien item.
Related
6 Best Puzzle Horror Games, Ranked
These games are here to provide players with plenty of scares and plenty of challenges due to the puzzling elements before them.
How to Open the Wooden Box in Machinika Museum Chapter 3
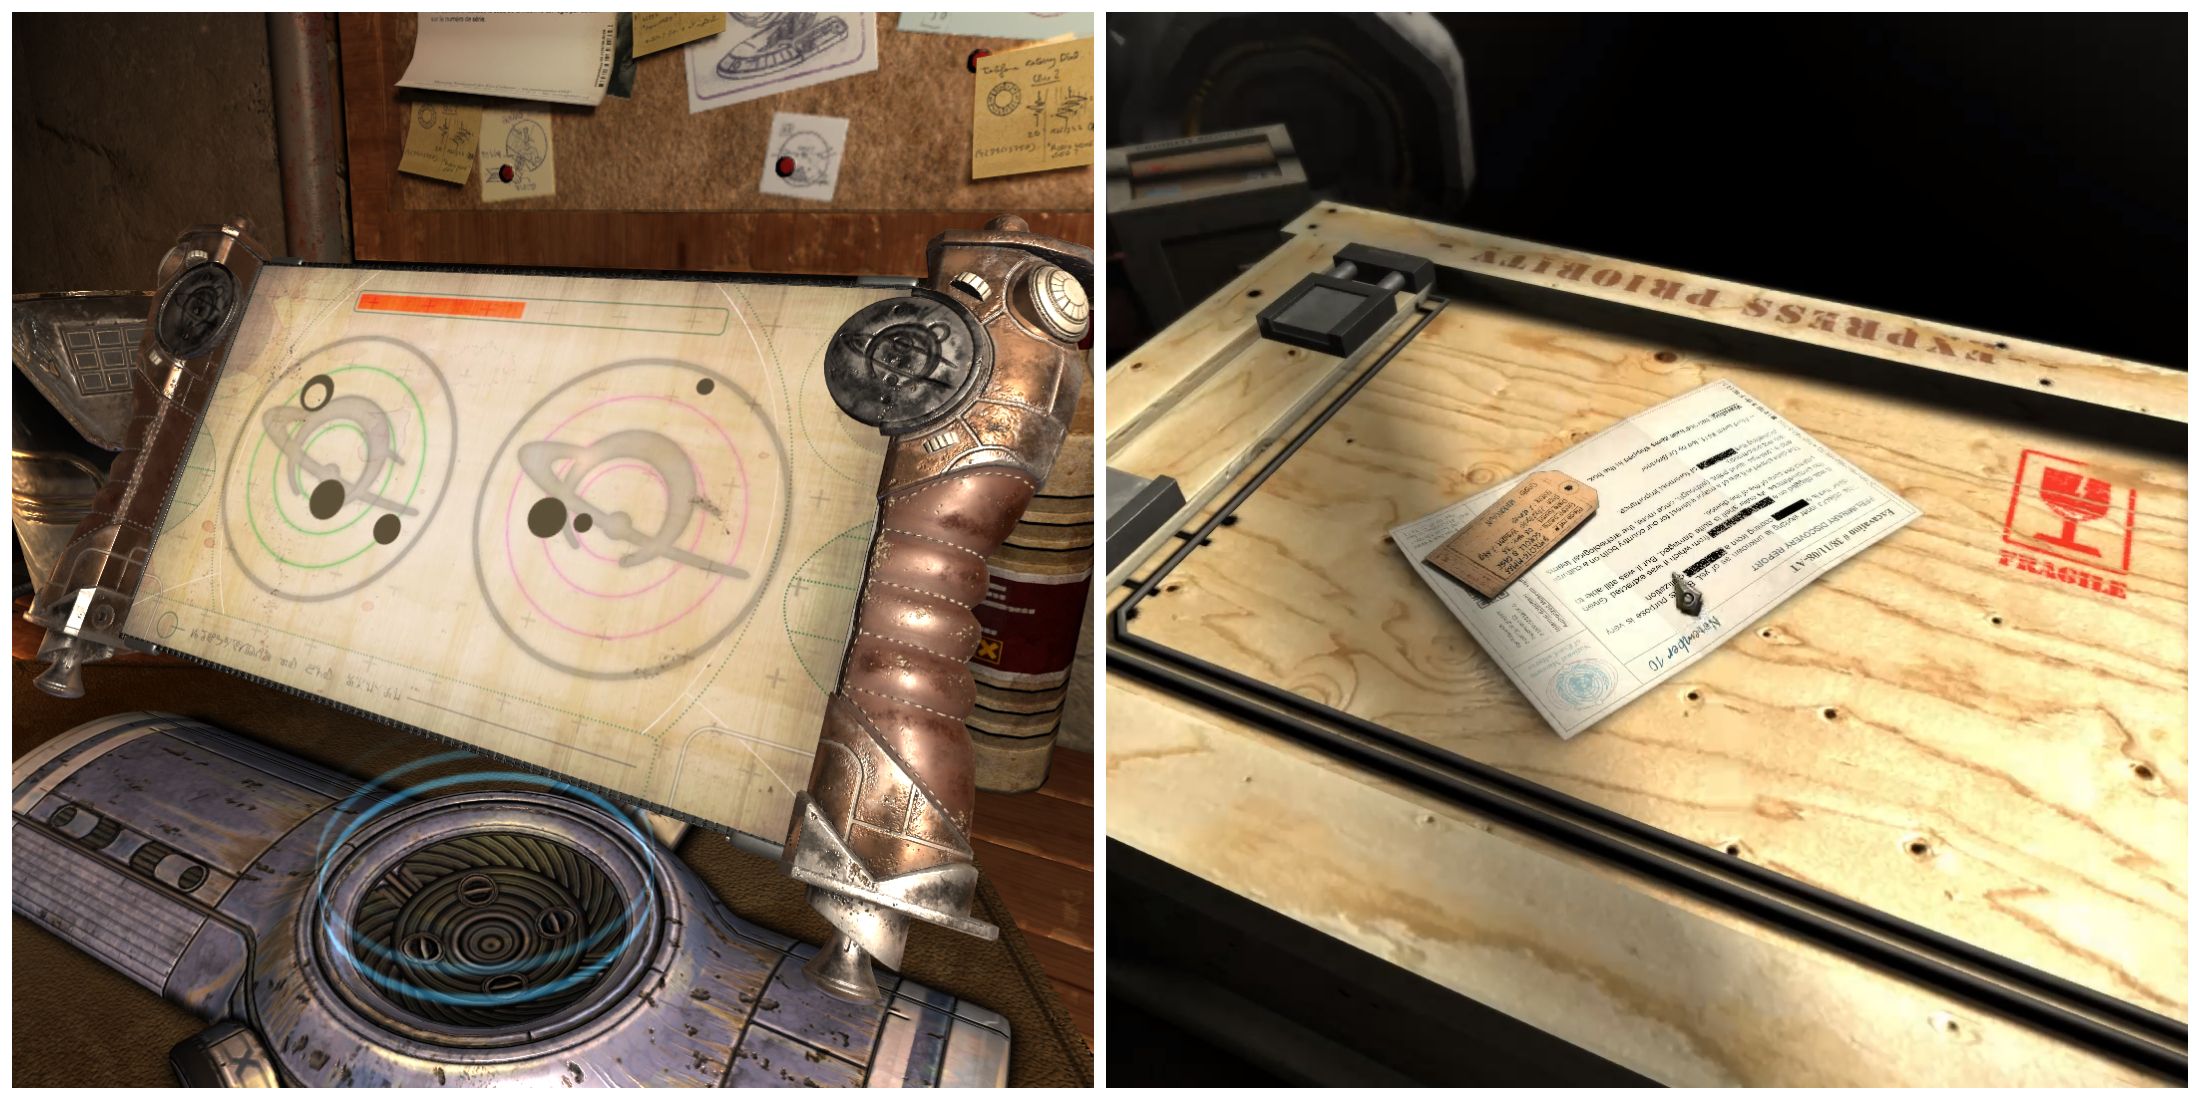
To open the box with the alien machine inside, start by picking up the keys and note on top of the box to add them to your inventory. Then, on the left side of the box, you’ll notice a keyhole. Insert the second key inside, and twist it to open to reveal a small compartment underneath. Take out the hidden note from here.
Now, head to the other side of the box where you’ll notice a bunch of blue buttons. The hidden note you got from the other side will tell you the order in which to press these buttons. You’ll want to do it in this order: A2, C1, C2, D2, E1, D1. This will open up two flaps on top of the box with keyholes. From your inventory, duplicate the third key using your printer. Place both keys into the keyholes and twist them to open the box successfully. You’ll then have solved the first half of Chapter 3’s puzzle in the advanced puzzle game, similar to that of Animal Well.
Related
10 Best Puzzle Games With PvP Multiplayer
Puzzle games are typically a single-player experience, but these games buck that trend and allow for some PvP puzzle-solving.
How to Complete Chapter 3 in Machinika Museum
With the box now open in Chapter 3, you’ll want to start by zooming in on the small, scratched-up opening next to the buttons on the machine. Inside this hole, place the mini-camera so you can see inside. Then, press the up button twice, and turn to the right. You’ll see the buttons from the inside, which will tell you which ones you’ll need to press on the outside.
When you exit the hole, go over to the side with the 9 buttons. The one on the bottom right will be loose, and you will want to press it to make it fall off. Then, grab the pen on the table next to the alien device. Return to the buttons, and use the pen to press the one on the bottom right. Then, press the rest of the buttons based on the third image above.
With the scroll out of here, zoom in on it, and it will eventually be placed on your anti-gravity machine. Again, zoom in on the bottom right, and pull out the small knob. As you’ll see with this, you’ll want to line up all three golden gears to where their blue line matches the blue line on the front. Using the red piece on the right side, this will stop the golden gear it is on from moving. This might take a few tries, but just keep messing with them until all the blue lines are together.
With the scroll open, zoom in on the left side into the corner. There will be a small area where you can insert a screwdriver inside. Once you place the screwdriver in front of here, you’ll want to use the knobs on the screwdriver to match the shapes on the scroll. You can do this by:
- With the first knob, start by switching over to the cylindrical shape.
- Then, with the second knob, move the cylinder shape to the bottom so it lines up with the bottom piece.
- Finally, with the last knob, twist this all the way to multiply the cylinder shape into three so it fills in all three shapes.
Now, press the orange switch at the top of the screwdriver to reset it. This time, with the first knob, choose the semicircle shape, move it up to the top using the second knob, and then use the last knob to fill in all three semicircles like you did the first time. Then, open up the knob on the left as it pops open, and take out the metallic ball. Duplicate this using your printer, and insert both metallic balls back into the area where you took out the first one.
Next, zoom out and spin the scroll to check the back of it. You’ll notice two symbols on the top and bottom. These are the symbols you’ll want to input on the two metallic balls, as shown in the second image above. With this fixed, two planet images will appear on the front of the scroll. Flip to the back of the scroll again, and move the two silver pieces from the middle to the sides. In the middle here, you’ll spot some purple and yellow planets. You’ll want to replicate this on the front of the scroll.
On the front of the scroll, go over to the left, where you’ll see a small silver knob on the side. Twist this until the planets on the side match the first image above. Then, go over to the right side, and twist this knob to line up the planets based on the second image above. Finally, the planets will come together on the front of the scroll, and you’ll want to drag the green line to the right side to complete the puzzle. Chapter 3 will finally be wrapped up, but things will only get more difficult as you progress further in the well-loved puzzle game, Machinika Museum.
Machinika Museum is available now on PC, Nintendo Switch, iOS, and Android.
More
7 Best Philosophical Puzzle Games
There are plenty of puzzle games out there for gamers to try, but not all of them embrace philosophical themes. Here are the best that do.
/cdn.vox-cdn.com/uploads/chorus_asset/file/25733836/twinklylifestylepic.jpg)
