/cdn.vox-cdn.com/uploads/chorus_asset/file/25429565/Rabbit_R1_Settings.JPG)
The Ex-Requiem members are out for revenge against Director Edward “Eddie” Richtofen in Call of Duty: Black Ops 6 Zombies, and starting their journey involves prison breaks and monsters lurking in the sea surrounding Terminus Island. It’s time to embrace the Black Ops 6 Zombies main quest Easter Egg found in Terminus!
Related
Black Ops 6 Zombies: How to Get Mustang & Sally
Mustang & Sally bring forth explosive potential to Black Ops 6, returning to overpowered nostalgia with great success.
The Terminus Island Main Quest is a challenge to complete, but for players who are willing to embrace the difficulty for the story, experience, and rewards, a cohesive guide can be found below.
Obtain the Beam Smasher
How to Craft the DRI-11 Beamsmasher

In order to start the Terminus Main Quest, players must have acquired the Beamsmasher, which is the Wonder Weapon found on Terminus Island. Players can get the Beamsmasher by getting lucky at the Mystery Box, or using the Wonderbar! GobbleGum. Alternatively, players can get the Beam Smasher by crafting it, and here’s how:
- Outside of the Storage Area
- Outside Communications’ upper level
- By the Docks before the Sea Tower
- Enter the Sea Tower where Elemental Pop is located and interact with a briefcase that has a hand attached to it to pick up the Multiphasic Resonator.
- Purchase a Deadwire Ammo Mod and shoot that weapon at an electric circuit in the broken window on the Inclined Lift going up from the Bio Lab, and follow the circuit to other electrical boxes.
- Enter the Research Office at the Rec Yard kill the trapped zombie and then pick up the EMF Fob
- Interact with the computer in the Research Office, twice
- Pay Peck 5,000 Essence in the Guard Station to acquire the code that can be entered at the computer in the Research Office
- Finish the Round, then head to the specified island marked by the computer and place the Multiphasic Resonator by the glowing orb. Kill the unlimited spawning zombies and one will glow the same color as the orb and drop a pickup which can be placed into the orb twice. The orb will fly off to a different island, so pick the Multiphasic Resonator back up and repeat the step at a new island until players can pick up the AMP Munition.
- Head back to the Research Office and hold interact on the workbench to craft the free Beamsmasher.
Acquire the Hard Drive and Give it to Peck

Once the DRI-11 Beamsmasher has been acquired, players will need to head down to the Bio Labs. Inside the Bio Labs on either of the two doors leading out to Speed Cola or PhD Flopper, there will be a Tentacle Trap along the wall that can be purchased for 750 Essence. Players will need to purchase the Tentacle Trap and then look up and use the Beamsmasher’s standard attack (R2/RT/Left-Click) to fire the beam at the tentacles. If done correctly, a Hard Drive should pop out from the tentacles. The location is random, so if the Hard Drive doesn’t appear from the Tentacle Trap at PhD Flopper’s door, try the Speed Cola room instead, and vice versa. Once the Hard Drive has dropped, pick it up with the interact button.
With the Hard Drive in hand, players will need to enter back to the spawn location at the Guard Station where they can see Peck and Strauss in the control room. Interact with the drop box in the Guard Station to deposit the Hard Drive which will allow him to hack the central containment unit in the middle of the Bio Lab, where Maya’s brother, Nathan, is held. Head down to the Bio Lab and interact with the central cylinder to see Nathan, and then it’s time to free him.
Find the Codes to Nathan’s Containment Unit
How to Free Nathan in Terminus

Players will need to collect three numbers in a specific order if they want to free Nathan as the next step of the Terminus easter egg quest. These codes can be found in the order below:
Number #1

Inside the Interrogation Rooms where Quick Revive is stationed, head to the fenced wall of the interrogation room, noted by the bloodied chair in the middle. Look at the clock at the back wall and make note of the hour hand, as this will be the first number.
Number #2

Following the path from the Interrogation Rooms, players will enter the Mess Hall. On the East wall, there is a wooden pinboard that has a playing card attached to it. The number on the playing card is the second number that needs to be memorized.
Number #3

The third and final number is located in Engineering, the room close to where Juggernog can be acquired. At the back of the northeast wall, there will be a sign that says “Safety First: Days Since Last Injury” with a number written in a white box. That number is the third and final number players need.
With these numbers, players can head back to Nathan’s unit in the Bio Lab and enter the numbers in the correct order listed above to unlock the containment unit.
Warning: The next step involving the valves on Nathan’s containment unit will begin a boss fight, so it’s best to come
prepared with perks
, armor, and Pack-a-Punched weapons, as a tough fight is ahead.
When players are ready, there are four valves found at the back of Nathan’s control unit, so hold the interact button on them either solo or with allies to lock yourselves into the Bio Lab and begin a boss fight.
Defeat Nathan in the Bio Lab
How to Beat the Amalgam Nathan
An unlimited amount of zombies will continue to pour into the Bio Lab while Nathan also chases players down. Nathan acts like the regular Amalgam mini-boss but with more health. To defeat Nathan in Terminus, the best thing players can do is stay on the move and utilize powerful weapons like the Wonder Weapon and hard-hitting or fast-firing weapons that have been upgraded with Salvage and the Pack-a-Punch. The sole focus is to stay alive and kill Nathan, but be warned, Nathan will consume other zombies to heal himself, so try to make sure there is not an overwhelming amount of undead.

After Nathan has been killed, a cutscene will play, and after it, players will want to jump into the waters below the Bio Labs where they can swim South West and North West, just to the right of where Pack-a-Punch is to pick up a Key Card. Players can take this Key Card to the Communications room where on the top floor facing the wall will be a computer terminal with green text. Interacting with the computer will come up with a “Network Connection Error” message.
Fix the Computer with Node Connectors
This step will initiate a lockdown with many zombies that need to be killed, so ensure you have a confident loadout before proceeding.
After the computer shows the “Network Connection Error” message, players are going to want to take a boat and head out into the wrecked ship. Underneath the wrecked ship there will be a ladder that leads into a Workshop room. Inside the Workshop, there are some Node Connectors that can be picked up. Upon picking them up, a lockdown will begin. Node Connectors can be dropped, and those carrying them cannot sprint, so bear that in mind while doing the lockdown.
After killing all of the zombies that spawn during the lockdown, the ladder down to where they left their boat will be open again. Simply pick up the Node Connector and take it to the South Island, known as Crab Island. Opposite the Workbench will be a slot to place the Node Connector. To place the Node Connector, make sure it has been picked up and then hold the interact button. If this slot has been filled, then there are two other spots.
The second location for the Node Connector is directly underneath the Sea Tower, so take the boat back to the main Terminus Island. Players should have two Node Connectors that they need to connect in total.
The third location to fill in the Node Connector is found on the main Terminus island, so take the boat back there and go into the Sea Caves on the Speed Cola side. Facing a wall in this area, players will see another location to place the Node Connector. Players can return to the Guard Station and take the Hacking Device from the deposit box where Peck will be.
Hack the Buoys and Defuse the Bombs
How to Use the Hacking Device
Starting this step of the main quest will begin a timed event, so be prepared with the best weapons, perks, and shields. It’s also recommended to take Monkey Bombs or LT53 Kazimirs.
To start this step, players must use the Hacking Device on the three Buoys found around Terminus Island in the Sea. Players will need to take their boat out to the Sea and locate Buoys, noted by the Parasites that linger around them. At one Buoy, hold the interact button in the water to pull out the Hacking Device and wait for the hacking to complete. This will begin a timed event which players have around 2 minutes to complete. After the first Buoy, simply follow the circle of the island in an anti-clockwise direction to find the other two Buoys. If players still have the Buoys Losing Connection timer, then it means there is an additional Buoy they missed.
Once all the Buoys have been hacked, immediately drive the boat back to the Bio Lab, as the quicker players get here, the better. After a short dialogue exchange, players will have 5 minutes to complete the Bomb Detonation step, otherwise it’s game over. In the Bio Lab, there are 3 bombs that must be defused, and they can be defused by holding the interact button on them for 10 to 15 seconds. Progress saves, so don’t feel like you have to hold the interact button for the entire progress meter.
Follow through the Bio Lab and look into the open windows and doors to find 2 bombs on the lower floors, and one bomb on the middle floor. It’s advised to throw Monkey Bombs before attempting to defuse, as an endless stream of zombies and mini-boss enemies will spawn to deter progress. Players only have 5 minutes to do this, so if working as a team, ensure everyone has zombie-distracting tactical equipment or weapons good enough to defend the operator defusing the bombs.
Once all three bombs have been deactivated, the Bomb Detonation timer will end, and the purple-eyed zombies will all die. At this point, players are ready for the final step: the boss fight. However, it’s essential that players jump in with the best equipment and loadout possible so don’t feel like you have to start the boss fight straight away. You can also save and quit at this point to better prepare at a later time.

Once players are ready for the boss fight, head to the lower levels of the Bio Lab where they can interact with the slightly ajar door next to Melee Macchiato in order to enter the boss room.
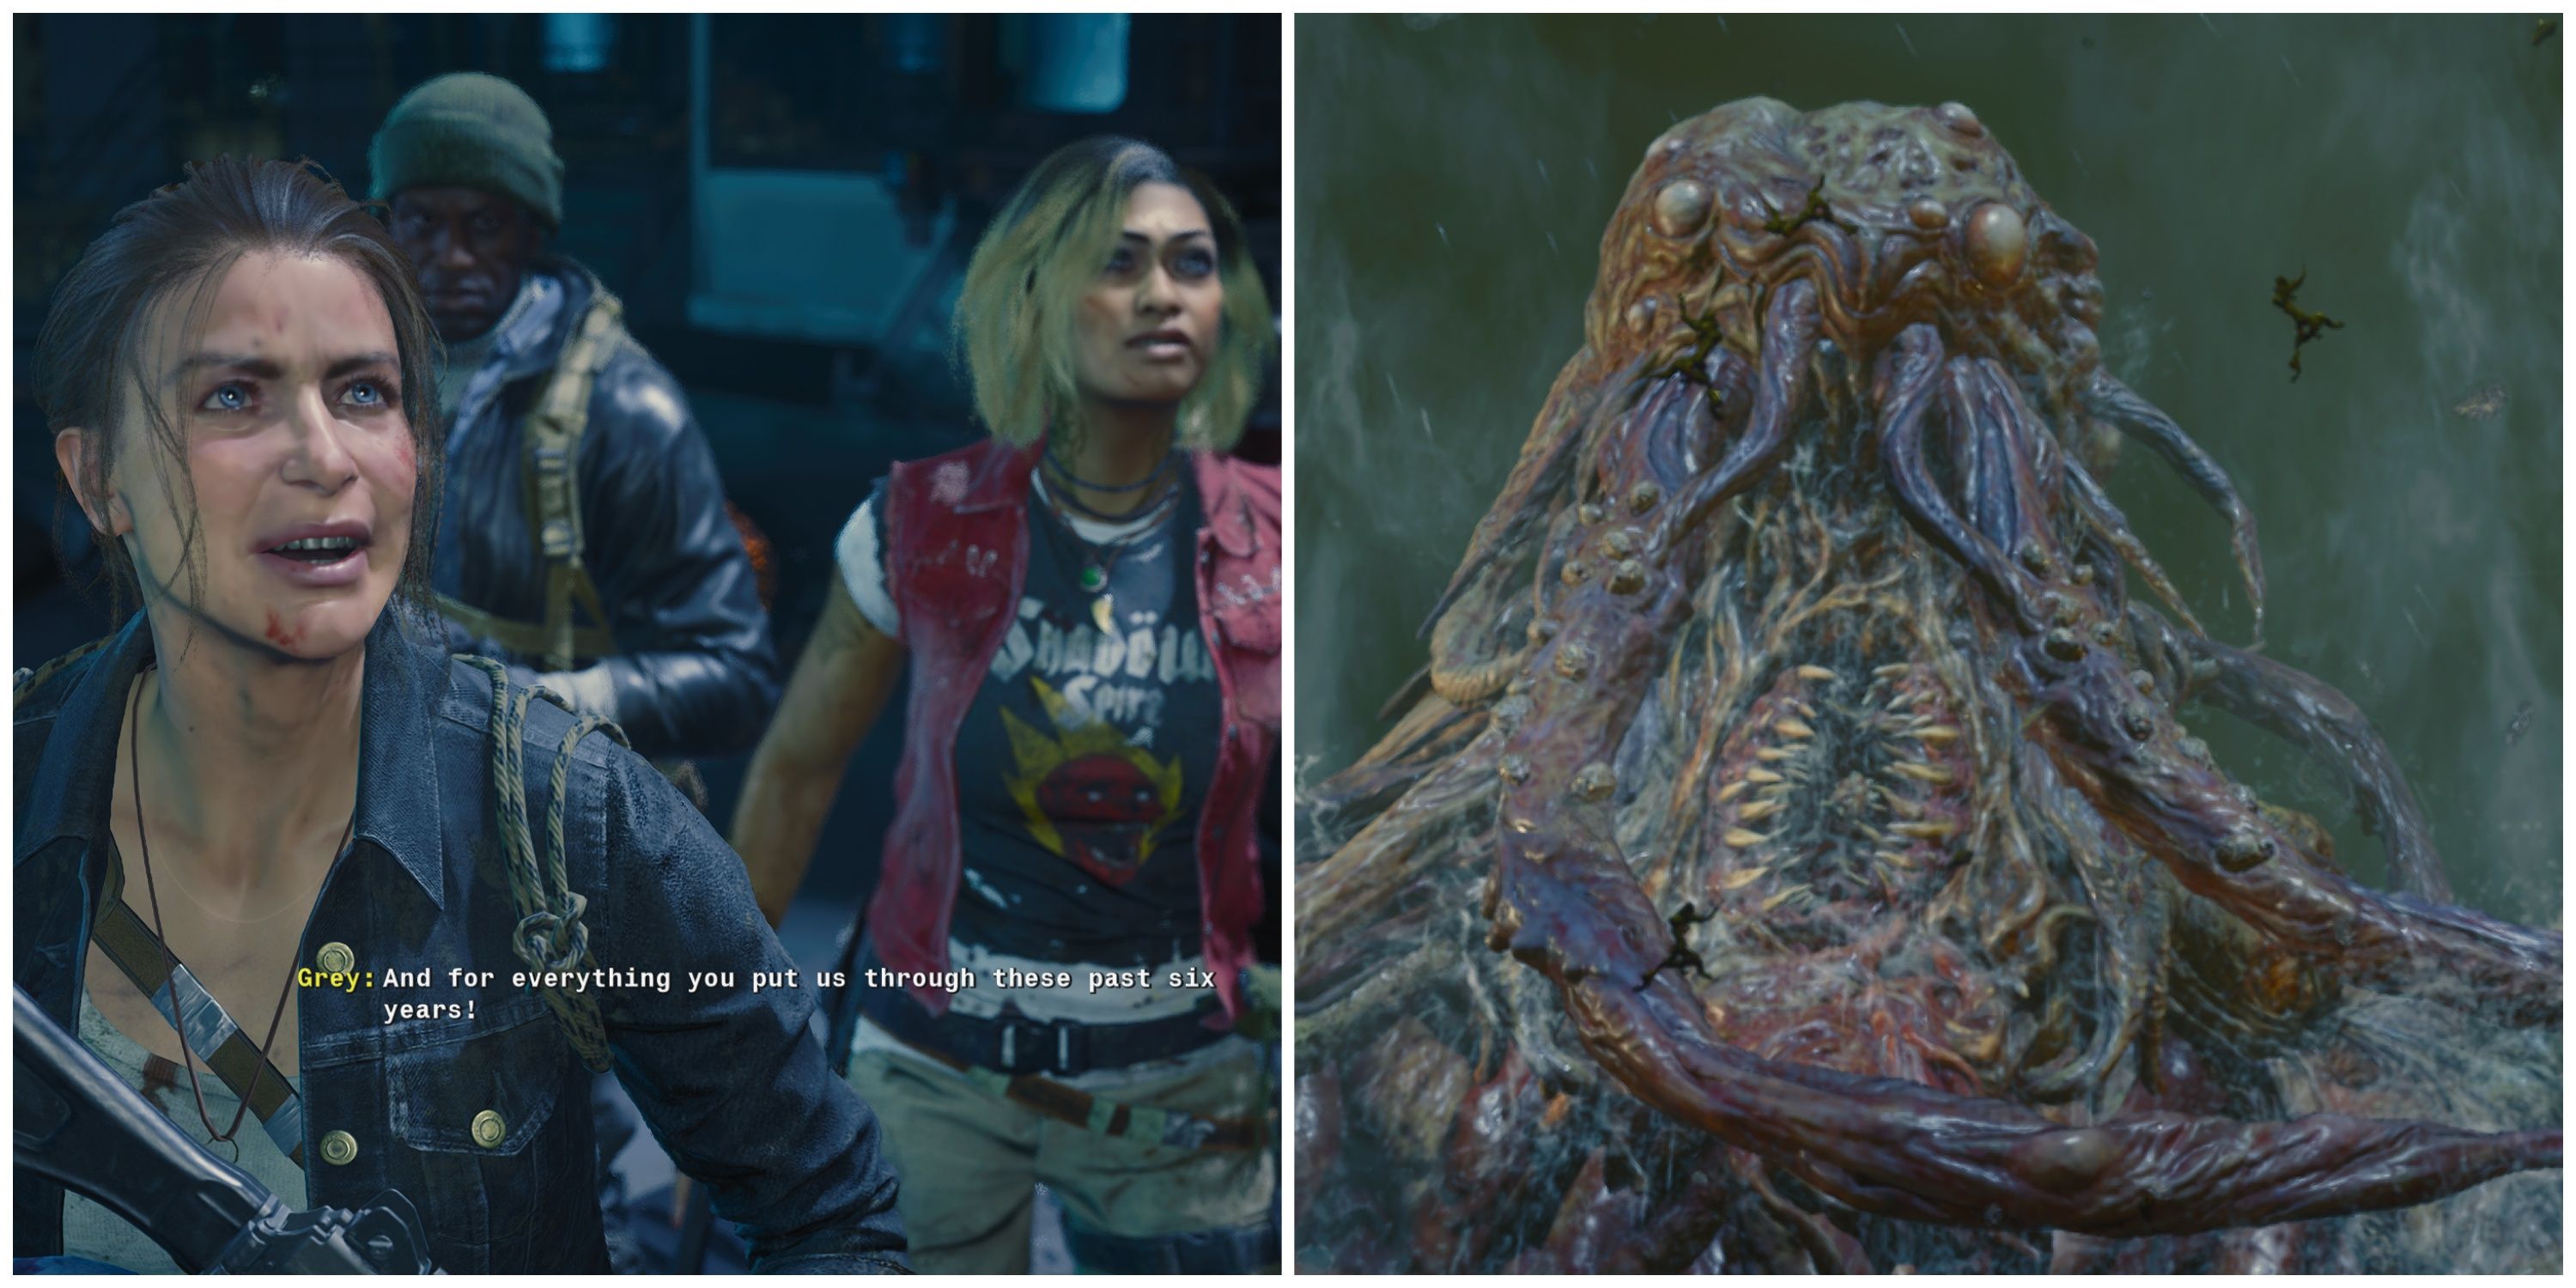
Defeat Patient 13, the Terminus Boss Fight
How to Beat Patient 13

Loadout recommendations involve PhD Flopper, Deadshot Daquiri, Juggernog, and Tier 3 Pack-a-Punched Wonder Weapons.
Patient 13 is the Cthulhu-inspired boss fight that will take players to a hollowed square arena. There are a few things to be mindful of in this boss fight, like how exactly to damage Patient 13 and what attacks to watch out for. Zombies will always be spawning during this boss fight, and there’s a replenishing ammo crate found at the back of the arena.
The Patient 13 boss fight has three phases, with the first being its most simple. Patient 13 will use the tentacles on his back that he will slam at the front of the arena. Around the boss in the distance, there will be tentacles that fire gaseous lightning attacks. In order to damage the boss, watch for red bulbs that appear on his shoulders and shoot them with your weapons. Try to stay aware of the damage patterns to predict when to stay on the move and when to shoot. After doing enough damage, Patient 13 will submerge in the water.

To activate the second phase, players must eliminate the mini-boss zombies that have spawned in. The second phase plays similarly to the first, but now the damage spots will be in Patient 13’s mouth. Patient 13 will also use his tongue at the back of the arena, so try to avoid it when shooting for the mouth. After enough damage has been dealt, the third and final phase will begin.

For the third Patient 13 phase, he will have an electrical field around him and block off the sides of the arena. When an electric orb is being summoned by the boss, hide behind some cover and wait for it to explode. To damage the boss in the third phase, shoot at his glowing blue eyes, his mouth when he opens it, or the red bubbles that appear on his body.
After the boss dies, a cutscene will play, and then it’s all over and players have completed the Terminus Main Quest!
Terminus Main Quest Rewards
What Do You Get For Completing the Terminus Easter Egg?
After heading back to the lobby screen, players will have unlocked two unique rewards to showcase their mastery of Terminus Island.
- The first reward will be the Trophy Collector Operator Skin for Maya.
- The second reward will be the Terminus Quest Complete Calling Card, which will have a gold skull in the bottom right corner if completed upon release week.

- Released
- October 25, 2024