
From the very beginning, it was pretty clear who the final boss was going to be in Salvation’s Edge, the newest raid in Destiny 2. There was no way that players were going to be able to defeat the Witness on their own in the campaign, as it is far too powerful. So, before the combined forces of Sol can destroy the Witness, they must first break its hold on the Traveler. That is exactly what the final encounter of Salvation’s Edge entails.
After completing the fourth encounter, players have a little bit of platforming to do. When they enter the chamber at the end and go up the elevator, they will be face to face with the Witness as it prepares to unleash the Final Shape. This is a challenging boss fight, but if players can beat Verity, they have a solid chance of overcoming the Witness.
Related
Destiny 2: Salvation’s Edge Loot Table
Salvation’s Edge offers a new set of gear that Destiny 2 players will want to get. Here are all of the equipment you can get from this raid.
How to Beat the Witness

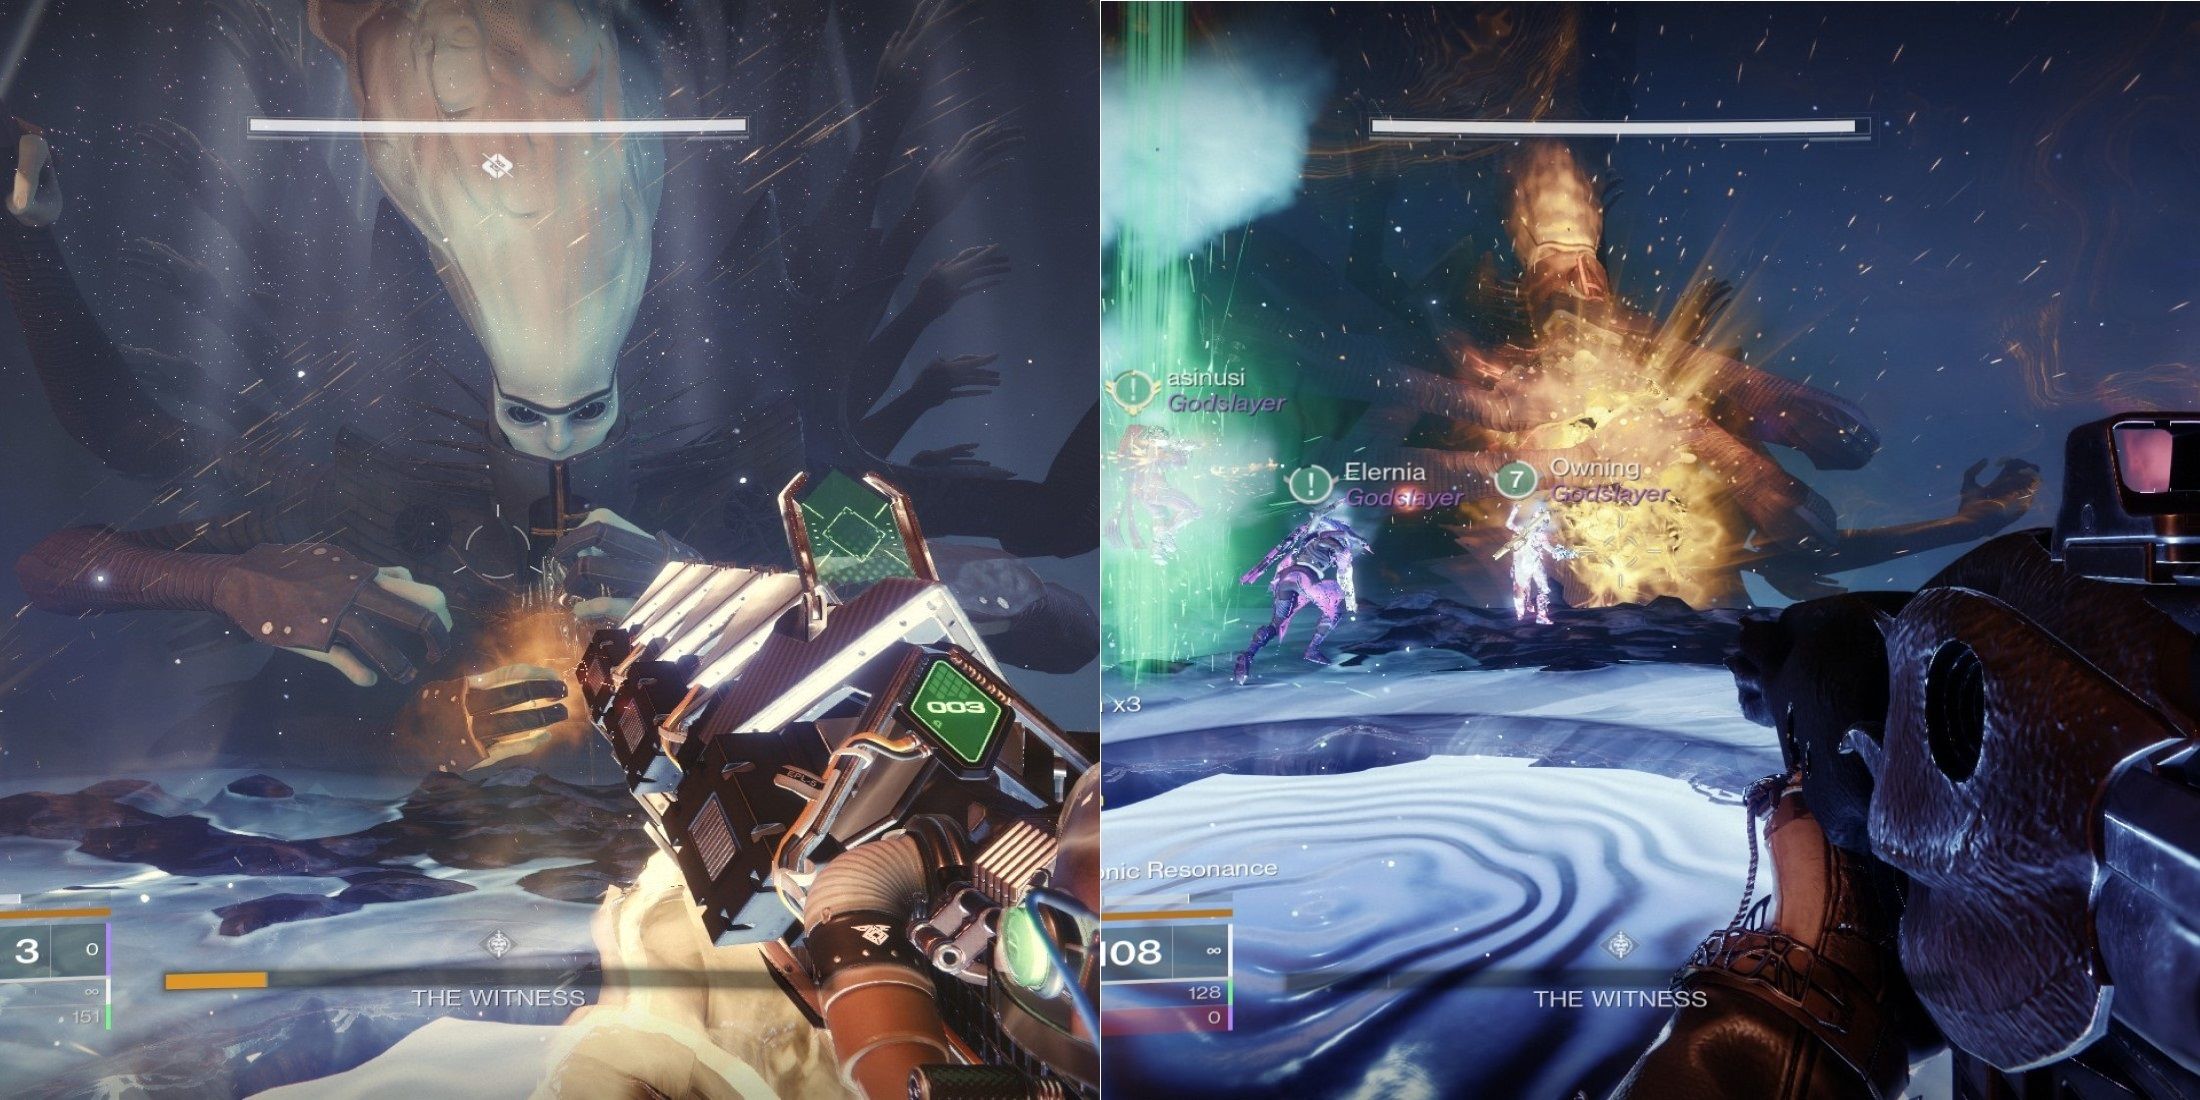
Before starting the encounter, make sure to have the raid split into two groups of three. One group will kill adds on the left while the other group kills adds on the right. As the fight begins, you will immediately notice all the Witness’s hands from earlier encounters doing the same attacks that you had to watch out for. Instead of just being something to watch out for, these attacks are now important mechanics for this encounter. Also make note of the circles on the Witness’s front.
If you stand in these attack patterns long enough, you will get one of the Resonance buffs from previous encounters. However, you don’t want to stand in these attacks any longer than you have to since they can still kill you. If you accidentally get one of the buffs, and you weren’t intending to, you can cleanse it off of yourself by standing in the energy field on the wood platform that is used for the damage phase later on. In addition to getting a buff, you will also need to stand in these attacks long enough to attack the hand unleashing it.
By doing enough damage, you can temporarily take out the hand and stun it. During this time, it will reveal a color and a symbol on the wrist. If you see a red color appear on the wrist, you will need to get the square Resonance buff. If you see yellow, you will need the circle Resonance buff, and if you see green, you will need the triangle Resonance. Before each hand unleashes an attack, you will see the symbol of what kind of Resonance you will get when you stand in that attack.

Related
Destiny 2: Dual Destiny Walkthrough
To get the Exotic class item, players will have to run the Dual Destiny Exotic mission in Destiny 2. Here’s how to complete it.
Once you have the right buff, stand in the attack field of the hand that matches your buff, attack it, and the hand will be destroyed. Once you’ve destroyed a hand, go down into the middle of the arena and shoot one of the circles on the Witness. This destroys the circle and spawns a Subjugator, which needs to be killed as quickly as possible. Keep destroying hands to gain the Glyphbreaker buff and destroy the circles on the Witness’s front.
Periodically, one of the hands will glow brightly when destroyed, and you will see a message in the lower left-hand corner of the screen that says: “The Witness tests you…”. At this point, a series of dark nodes appear in front of the Witness. You must destroy enough of them so that they form the shape that was on the last hand that you destroyed. The images below show the shapes that you want to make depending on this.
If you do not make the correct shape, you and your entire raid team die instantly. If you succeed, you will still need to be ready to dodge an attack anyway.

Watch the Witness closely and wait to hear a “shing” sound as the Witness’s eyes begin to glow yellow. The moment this happens, everyone should jump to avoid getting hit by the attack that temporarily covers the entire arena for a few seconds. Glide to stay in the air until the attack fades away.
While several members of the raid team handle the mechanics above, everyone else should focus on keeping adds under control. The enemies here will try to pull you using Strand, and this can potentially get you killed if you get pulled at the wrong time.
In order to trigger the damage phase, you will need to destroy all the circles on the Witness. Once the final circle has been destroyed, everyone should quickly head to the middle platform as it rises. Just like Rhulk in Vow of the Disciple, the Witness has its own damage phase at the same time that you are in a damage phase. While shooting the Witness’s big crit spot on its chest, you will need to be carefully watching for the barrage of attacks it will unleash.

Carefully watch for the attack patterns depicted on the ground and move to avoid them. Periodically, the Witness will also do the attack that covers the ground so you will need to time your jump. These attacks can easily kill players even without Contest mode enabled, so you will want to avoid getting hit at all costs. Losing too many people can result in a bad damage phase and potentially a wipe. So that most of the raid team can focus on damage, have one player call out which direction to move to avoid getting hit by the attacks.
Once the damage phase ends, make sure to get off the platform quickly to avoid getting knocked off by the Witness. Repeat the steps above to start another damage phase. As is traditional, the Witness has a Last Stand phase. It is at this point that it realizes it is losing and will attack much more frequently. If you can take out this last chunk of health before your time is up, you will have successfully beaten the Witness and cleared Salvation’s Edge. Enjoy the new emblem and Exotic, if you are lucky enough for the latter to drop.