Quick Links
- How To Complete The Importance of Aiding Ernesto In Dragon’s Dogma 2
- The Importance of Aiding Ernesto Rewards In DD2
Dragon’s Dogma 2 has become widely popular because of its massive open-world, cave exploration, combat, and side quests that keep the players engaged throughout their playthrough. On top of this, Capcom’s game also features multiple endings. These endings showcase different outcomes based on the hours played and the choices the player has made. Apart from the main endings, Dragon’s Dogma 2 also has a true ending, which throws the player into the Unmoored World. In this world, the enemies are tougher, and the red fog slowly covers and decimates entire cities.
One of the late-game quests is The Importance of Aiding Ernesto, which is the evacuation quest for the Volcanic Island Camp area. This walkthrough covers the entire quest and what rewards the player can get upon completion.
Dragon’s Dogma 2: How to Target Enemies (Lock On Alternative)
Although the lock-on mechanic is absent in Dragon’s Dogma 2, there are other alternatives that you can use to lock on specific enemies during battle.
How To Complete The Importance of Aiding Ernesto In Dragon’s Dogma 2
After traveling to the Volcanic Island Region, in order to evacuate the people, you will have to make your way first to the Volcanic Island Camp. Here, you will come across Ernesto, who is a Battahli Knight, and after hearing your evacuation plan, he will ask you to go to the blacksmith and his wife and escort them back to the camp. You will have to follow the western path below the Red Beacon. You can interact with the beacon to start the fight with a very powerful dragon. However, it is recommended that you fight it after evacuating the people of all regions.

Following the path, you will come across a few bandits whom you can easily deal with. Proceed forward and into the small cave that harbors a deadly beast.
Fighting the Goreminotaur

Inside the small cave, you can find a four-health bar Goreminotaur. Aiming for its head is the path to victory in this fight. This body parttakes comparatively more damage and can also knock down the beast, allowing you to follow up with more damage.
One of the Goreminotaur’s deadliest moves is the charge attack, where it rushes at you from afar. This can take out a huge chunk of your health if not dodged. If you are playing Dragon’s Dogma 2‘s Thief Vocation, then you can make great use of your Helm Splitter or its upgraded version, the Skull Splitter, to dish out serious damage to the boss.
The beast is weak towards fire attacks.
- This encourages Mages and Sorcerers to rapidly cast High Salamander and High Flagration to burn the beast and end the fight quicker.
- If you are playing the Magick Archer, you can make use of Irradiant Orb or its upgraded version, Candescent Orb, to set fire to the Goreminotaur.
Escorting Gautstafr and Cliodhna

After fighting the Goreminotaur, you will come across a few Hobgoblins that you must deal with. You can ignore them, but this will be the path you escort the people back from, so it is best to clear the way for them. Keep following the path until you see a Campsite before which you need to take a right.
Here, there are a few Rattlers that blend perfectly with the environment, so be wary of your surroundings so that you do not get attacked by a rolling Lizard. Finally, you will reach the house where Cliodhna is standing. After being asked to leave, you can head inside to hear the conversation, after which you will need to Escort both of them back to the camp.

If you have killed all the enemies on the path you took to get to the house, then you should be able to walk back without worrying. Gautstafr does have a back problem, so he will follow you around slowly. You can speed this up by carrying him by pressing the Grab button and running back to the Camp. Once you get them safely back, you will unlock the Magick Archer Vocation if you haven’t already and can head back to Ernesto.
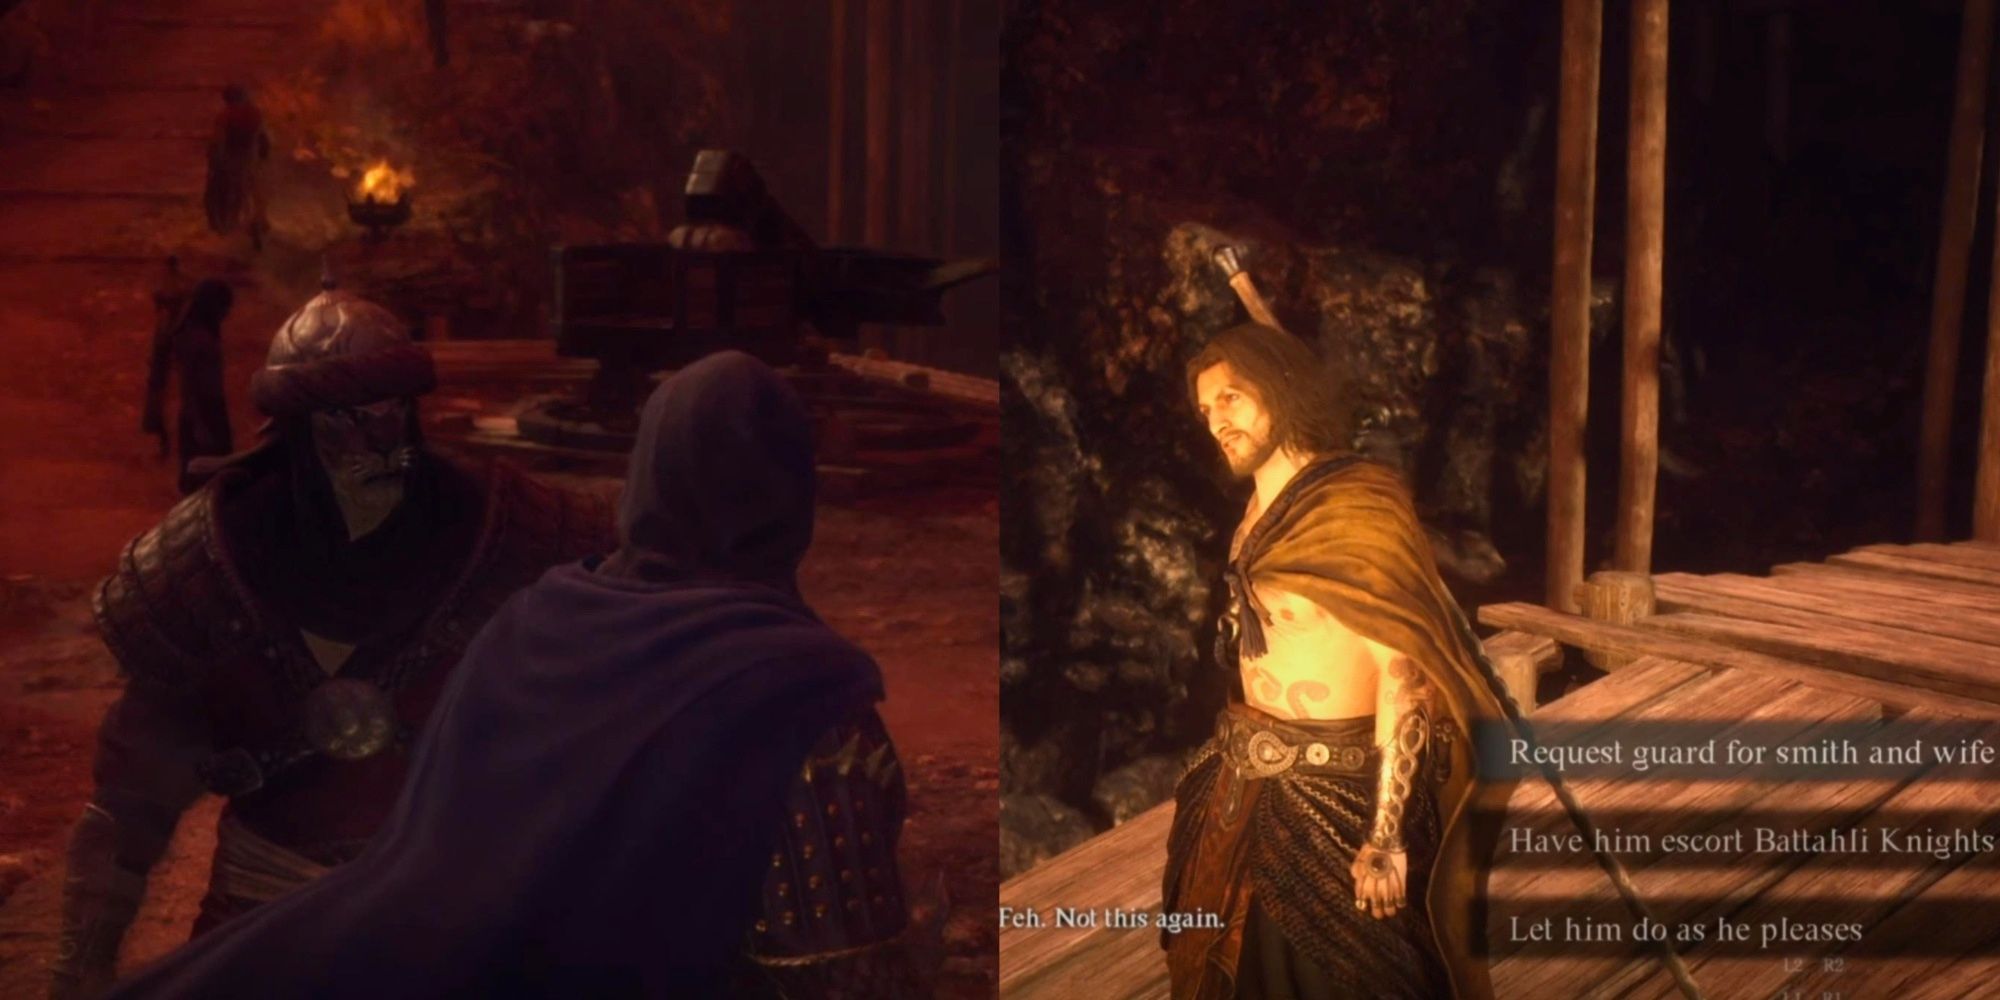
Convincing Lamond

Back to where Ernesto is, you will find him arguing with Lamond. Ernesto will ask you to speak with Lamond and convince him to evacuate with everyone else. Here, you will have three choices to choose from; the outcome of this conversation will not change, so it is best to choose from the first two. Letting Lamond do as he pleases might not be appreciated by Ernesto. After the conversation, you will unlock the Warfarer Vocation if you haven’t already and can return to Ernesto to complete the quest.

Dragon’s Dogma 2: How to Get and Use Lantern Oil
While exploring the darkness in Dragon’s Dogma 2, a lantern is your best friend. Here is how you can use this item and fuel it with Lantern Oil.
The Importance of Aiding Ernesto Rewards In DD2

After successfully escorting the blacksmith and his wife and having a conversation with Lamond, the quest will be completed, and all the people of Volcanic Island Camp will proceed to evacuate. You will be rewarded:
- 20000 XP
- 15000 Gold
- Fuligin Ore
- 40 Wyrmslife Crystal
That should be more than enough rewards for a simple escort mission and will surely help you level up. With the quest completed, you can head to the next evacuation quest or deal with the beacon boss if you are up for the challenge.

Dragon’s Dogma 2
- Released
- March 22, 2024
- Genre(s)
- Action RPG